RSS

Monthly Archives: September 2013

How to setup static ip in centos

## Configure eth0
#
# vi /etc/sysconfig/network-scripts/ifcfg-eth0
DEVICE=”eth0″
NM_CONTROLLED=”yes”
ONBOOT=yes
HWADDR=A4:BA:DB:37:F1:04
TYPE=Ethernet
BOOTPROTO=static
NAME=”System eth0″
UUID=5fb06bd0-0bb0-7ffb-45f1-d6edd65f3e03
IPADDR=192.168.1.44
NETMASK=255.255.255.0
## Configure Default Gateway
#
# vi /etc/sysconfig/network
NETWORKING=yes
HOSTNAME=centos6
GATEWAY=192.168.1.1
## Restart Network Interface
#
/etc/init.d/network restart
## Configure DNS Server
#
# vi /etc/resolv.conf
nameserver 8.8.8.8 # Replace with your nameserver ip
nameserver 192.168.1.1 # Replace with your nameserver ip
—————————————————————————————————————————————————————————
—————————————————————————————————————————————————————————
—————————————————————————————————————————————————————————

In this post will show how to setup static ip address in centos 6.3. After fresh install of centos 6.3 system will not get ip address automatically and network interface will be down by default. You need to configure ip setting automatic or static in a configuration file.

See below the default Centos 6.3 network card configuration file.

[root@lx /]# cat /etc/sysconfig/network-scripts/ifcfg-eth0
DEVICE="eth0"
BOOTPROTO="dhcp"
HWADDR="00:1C:C4:48:6C:ED"
NM_CONTROLLED="yes"
ONBOOT="no"
TYPE="Ethernet"
UUID="2cb817b1-2553-4cf6-9d16-48a0ef32d3b2"

Here are steps to configure static ip address and auto start of network card once system rebooted.

Step 1: Configure Static IP

[root@lx /]# vi /etc/sysconfig/network-scripts/ifcfg-eth0 DEVICE="eth0"

BOOTPROTO="static"
IPADDR=172.16.10.24
NETMASK=255.255.0.0
#you can also get way here
#GATEWAY=172.16.20.1
HWADDR="00:1C:C4:48:6C:ED"
NM_CONTROLLED="no"
ONBOOT="yes"
TYPE="Ethernet"
UUID="2cb817b1-2553-4cf6-9d16-48a0ef32d3b2"
Save and exit 
:wq

Step 2: Stop and off in startup if Network Manager service is running.

[root@lx /]# service NetworkManager stop 
[root@lx /]#chkconfig  NetworkManager off

Step 3: Assign gateway ip address

[root@lx /]#vi /etc/sysconfig/network

NETWORKING=yes
HOSTNAME=lx.broexperts.com
GATEWAY=192.168.1.100

Step 4: Assign DNS server ip address

[root@lx /]#vi /etc/resolv.conf
nameserver 192.168.1.200

Step 5: Finally Restart Network service

[root@lx /]# service network restart

——————————————————————————————————————————————————————–

——————————————————————————————————————————————————————-
 
Leave a comment

Posted by on September 26, 2013 in Linux


How to Reset Forgotten Root Password in RHEL/CentOS and Fedora

In this post will guide you simple steps to reset forgotten root password in RHEL, CentOS and Fedora Linux with example. There are various ways to reset root password which are.

  1. Booting into single user mode.
  2. Using boot disk and edit passwd file.
  3. Mount drive to another system and change passwd file.

Here, in this article we are going to review “Booting into single user mode” option to reset forgotten root password.

Cautious: We urge to take backup of your data and try it out at your own risk.

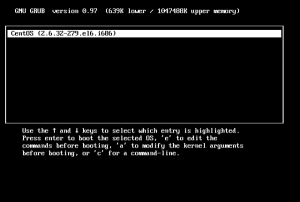
STEP 1. Boot Computer and Interrupt while booting at GRUB stage hitting ‘arrow‘ keys or “space bar“.

c-1

STEP 2. Type ‘a‘ to modify kernel argument. Anytime you can cancel typing ‘ESC‘ key.

c-2

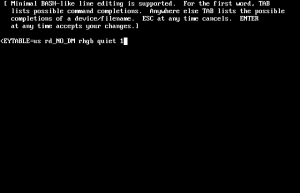
STEP 3. Append 1 at the end of “rhgb quiet” and press “Enter” key to boot into single user mode.

c-3

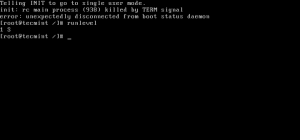
STEP 4. Type command “runlevel” to know the the runlevel where you are standing. Here “1 S” state that your are in a single user mode.

c-4

STEP 5. Type ‘passwd‘ command without username and press ‘Enter‘ key in command prompt. It’ll ask to supply new root password and re-type the same password for confirmation. “Your are Done” Congratulation!!!

c-5

What if GRUB bootloader is password protected? We’ll cover in our next article, how to protect GRUB with password and reset the same. Stay tuned…

—————————————————————————————————————————–

*****************************************************************************************************

1. Boot the system and when you see the following message “Press any key to enter the menu”, press any key. (You will see the list of available kernel versions.)

2. Press e in order to edit commands before booting.

3. Highlight the list item with vmlinuz in it by using the arrow keys and press e.

4. Now type single or init 1 at the end of the line.

5. Then press enter and b to boot the system with the new argument. (The system will boot into single user mode and you will see bash prompt)

Now it’s time to change the password:
6. Type passwd

1.### Shell Commands ###
2.passwd
3.Enter new UNIX password:
4.Retype new UNIX password:
5.passwd: password updated successfully

7. Type reboot to restart the system.

 
Leave a comment

Posted by on September 19, 2013 in Linux


Configure Apache to load mod_jk

Configure Apache to load mod_jk

Modify APACHE_HOME/conf/httpd.conf and add a single line at the end of the file:

# Include mod_jk's specific configuration file  
Include conf/mod-jk.conf

Next, create a new file named APACHE_HOME/conf/mod-jk.conf:

# Load mod_jk module
# Specify the filename of the mod_jk lib
LoadModule jk_module modules/mod_jk.so

# Where to find workers.properties
JkWorkersFile conf/workers.properties

# Where to put jk logs
JkLogFile logs/mod_jk.log

# Set the jk log level [debug/error/info]
JkLogLevel info 

# Select the log format
JkLogStampFormat  "[%a %b %d %H:%M:%S %Y]"

# JkOptions indicates to send SSK KEY SIZE
JkOptions +ForwardKeySize +ForwardURICompat -ForwardDirectories

# JkRequestLogFormat
JkRequestLogFormat "%w %V %T"

# Mount your applications
JkMount /application/* loadbalancer

# You can use external file for mount points.
# It will be checked for updates each 60 seconds.
# The format of the file is: /url=worker
# /examples/*=loadbalancer
JkMountFile conf/uriworkermap.properties               

# Add shared memory.
# This directive is present with 1.2.10 and
# later versions of mod_jk, and is needed for
# for load balancing to work properly
JkShmFile logs/jk.shm 

# Add jkstatus for managing runtime data
<Location /jkstatus/>
    JkMount status
    Order deny,allow
    Deny from all
    Allow from 127.0.0.1
</Location>

Please note that two settings are very important:

  • The LoadModule directive must reference the mod_jk library you have downloaded in the previous section. You must indicate the exact same name with the “modules” file path prefix.
  • The JkMount directive tells Apache which URLs it should forward to the mod_jk module (and, in turn, to the Servlet containers). In the above file, all requests with URL path /application/* are sent to the mod_jk load-balancer. This way, you can configure Apache to server static contents (or PHP contents) directly and only use the loadbalancer for Java applications. If you only use mod_jk as a loadbalancer, you can also forward all URLs (i.e., /*) to mod_jk.

In addition to the JkMount directive, you can also use the JkMountFile directive to specify a mount points configuration file, which contains multiple Tomcat forwarding URL mappings. You just need to create auriworkermap.properties file in the APACHE_HOME/conf directory. The format of the file is/url=worker_name. To get things started, paste the following example into the file you created:

# Simple worker configuration file

# Mount the Servlet context to the ajp13 worker
/jmx-console=loadbalancer
/jmx-console/*=loadbalancer
/web-console=loadbalancer
/web-console/*=loadbalancer

This will configure mod_jk to forward requests to /jmx-console and /web-console to Tomcat.

You will most probably not change the other settings in mod_jk.conf. They are used to tell mod_jk where to put its logging file, which logging level to use and so on.


————————————————————————————————————————————————————-


Configure worker nodes in mod_jk

Next, you need to configure mod_jk workers file conf/workers.properties. This file specifies where the different Servlet containers are located and how calls should be load-balanced across them. The configuration file contains one section for each target servlet container and one global section. For a two nodes setup, the file could look like this:

# Define list of workers that will be used
# for mapping requests
worker.list=loadbalancer,status

# Define Node1
# modify the host as your host IP or DNS name.
worker.node1.port=8009
worker.node1.host=node1.mydomain.com 
worker.node1.type=ajp13
worker.node1.lbfactor=1
worker.node1.cachesize=10

# Define Node2
# modify the host as your host IP or DNS name.
worker.node2.port=8009
worker.node2.host= node2.mydomain.com
worker.node2.type=ajp13
worker.node2.lbfactor=1
worker.node2.cachesize=10

# Load-balancing behaviour
worker.loadbalancer.type=lb
worker.loadbalancer.balance_workers=node1,node2
worker.loadbalancer.sticky_session=1
#worker.list=loadbalancer

# Status worker for managing load balancer
worker.status.type=status

Basically, the above file configures mod_jk to perform weighted round-robin load balancing with sticky sessions between two servlet containers (JBoss Tomcat) node1 and node2 listening on port 8009.

In the works.properties file, each node is defined using the worker.XXX naming convention where XXXrepresents an arbitrary name you choose for each of the target Servlet containers. For each worker, you must specify the host name (or IP address) and the port number of the AJP13 connector running in the Servlet container.

The lbfactor attribute is the load-balancing factor for this specific worker. It is used to define the priority (or weight) a node should have over other nodes. The higher this number is for a given worker relative to the other workers, the more HTTP requests the worker will receive. This setting can be used to differentiate servers with different processing power.

The cachesize attribute defines the size of the thread pools associated to the Servlet container (i.e. the number of concurrent requests it will forward to the Servlet container). Make sure this number does not outnumber the number of threads configured on the AJP13 connector of the Servlet container. Please review http://jakarta.apache.org/tomcat/connectors-doc/config/workers.html for comments oncachesize for Apache 1.3.x.

The last part of the conf/workers.properties file defines the loadbalancer worker. The only thing you must change is the worker.loadbalancer.balanced_workers line: it must list all workers previously defined in the same file: load-balancing will happen over these workers.

The sticky_session property specifies the cluster behavior for HTTP sessions. If you specifyworker.loadbalancer.sticky_session=0, each request will be load balanced between node1 and node2; i.e., different requests for the same session will go to different servers. But when a user opens a session on one server, it is always necessary to always forward this user’s requests to the same server, as long as that server is available. This is called a “sticky session”, as the client is always using the same server he reached on his first request. To enable session stickiness, you need to setworker.loadbalancer.sticky_session to 1.

—————————————————————————————————————————–

Configuring JBoss to work with mod_jk

Finally, we must configure the JBoss Tomcat instances on all clustered nodes so that they can expect requests forwarded from the mod_jk loadbalancer.

On each clustered JBoss node, we have to name the node according to the name specified inworkers.properties. For instance, on JBoss instance node1, edit theJBOSS_HOME/server/all/deploy/jboss-web.deployer/server.xml file (replace /all with your own server name if necessary). Locate the <Engine> element and add an attribute jvmRoute:

<Engine name="jboss.web" defaultHost="localhost" jvmRoute="node1">
... ...
</Engine>

You also need to be sure the AJP connector in server.xml is enabled (i.e., uncommented). It is enabled by default.

 
<!-- Define an AJP 1.3 Connector on port 8009 --> 
<Connector port="8009" address="${jboss.bind.address}" protocol="AJP/1.3" 
emptySessionPath="true" enableLookups="false" redirectPort="8443" />

Then, for each JBoss Tomcat instance in the cluster, we need to tell it that mod_jk is in use, so it can properly manage the jvmRoute appended to its session cookies so that mod_jk can properly route incoming requests. Edit theJBOSS_HOME/server/all/deploy/jbossweb-tomcat50.sar/META-INF/jboss-service.xml file (replace /allwith your own server name). Locate the <attribute> element with a name of UseJK, and set its value totrue:

<attribute name="UseJK">true</attribute>

At this point, you have a fully working Apache+mod_jk load-balancer setup that will balance call to the Servlet containers of your cluster while taking care of session stickiness (clients will always use the same Servlet container).

 
Leave a comment

Posted by on September 18, 2013 in Apache Server


Virtual Host + Apache httpd server + Tomcat + mod_jk connector

Virtual Host + Apache httpd server + Tomcat + mod_jk connector
In my last post (Virtual Host in Tomcat) we discussed about how setup the virtual host in Tomcat. Its cost effective technique because only one public IP is enough to host multiple domain. If we have big organization and each department want to host their website in locally in different machine. then how to achieve the virtual host concept?. In this post we will see the how we do this.

Update : I posted Virtual Host + Nginx + Tomcat Its easy to configure, compare to Apache httpd server

Problem Scenario:
In big organization they have multiple department, each department want to host their website in different machine. so these websites are accessed locally with different local IP address.

When we mapping to public address then we face the problem. We have two choice either purchase as many public address or Put one server front and delegate these request.

We going to use 2nd option. we put Apache httpd web server in front of all department servers. so only one public IP is enough. All domain DNS entries are pointed to Apache httpd server. Then Apache server delegates these request to corresponding tomcat server. This process is completely transparent from users(browser) perspective.
Outline Structure of Virtual Host Implementation
How Apache httpd web server communicate to Tomcat server
Before we going to detail about how communication happen between httpd server and tomcat

How many ports are bind when we start single tomcat?

shutdown port
http connector port
https connector port (optional)
ajp port

The port configuration are stored in $CATALINA_HOME/conf/server.xml file. we can change the ports when its necessary.

here AJP(Apache JServ Protocol) is a binary protocol that can proxy inbound requests from a web server through to an application server that sits behind the web server.

Apache httpd webserver communicate to Tomcat sever through AJP protocol.

When we install Apache httpd server, It don’t have inbuilt capability to support ajp protocol. so we need mod_jk module. Its add the ajp support to Apache httpd server.

Steps to Implement Virtual Host Concept in this Scenario:

Install Apache httpd Web Server
Install mod_jk connector
Configure JK Connector
Configure Apache httpd server apply virtual host concepts

Prerequisite : We already installed Tomcat in different departments and deployed the application and works fine.

Install Apache httpd web server
We can install Apache web server in two ways.
– Binary module
– From Source

We can install Apache httpd server from distribution package manager (either apt-get or yum). Or we can download the source code and then compile and install.

Note : –

we need to install apr, apr-util and pcre libraries because Apache httpd server depends on these libs.
But these libraries are no need to install from source. because we not going to do any customization.
so install these lib as binary using apt-get (debian/ubuntu) or yum command (redhat/fedora).

in ubuntu u can search through

sudo apt-cache search apr

we use second option. First download the httpd server source code from here . then extract it and install

./configure –prefix=/usr/local/apache –enable-rewrite=shared –enable-proxy=shared
make
sudo make install

here
–prefix option to mention where the location we going to install Apache httpd server.
–enable-rewrite and –enable-proxy options to enable these module in shared mode. These modules are not needed now. but we used in future for rewrite the URL before handover to next chain of servers and load-balancing support.

Install mod_jk connector
Now Apache httpd server is ready. we need to add ajp support to server.
download the mod_jk connector module from here. extract it and install it
cd native
./configure –with-apxs=/usr/local/apache/bin/apxs

make
sudo make install

here –with-apxs option to specify where apxs module is located. so we need to give Apache httpd server location.

now mod_jk.so files is created on modules directory in apache installed location (/usr/local/apache/modules)

Configure mod_jk connector
This step have 2 sub step

Create workers.properties file
Load and configure the JK connector module in apache httpd.conf file

Create workers.properties file
mod_jk connector is ready. but this connector is works based on configuration file. so we need to create configuration file called workers.properties file

this file syntax is key=value pair,
here we define the workers. i.e all department tomcat hosts IP address and ajp port for corressponding tomcat.

here entry format is look like
worker..property=

for example
worker..type=ajp13
worker..port=
worker..host=
worker.list=

here
worker.list key have all workers name separated by comma.
type = here type of the worker. we use ajp13 version
port= we specify the ajp port (not http port ) of that server
host= IP address or host name of tomcat server

workers.properties

worker.list=department1,department2,department3

worker.department1.type=ajp13
worker.department1.port=5000
worker.department1.host=192.168.5.10

worker.department2.type=ajp13
worker.department2.port=5000
worker.department2.host=192.168.6.10

worker.department3.type=ajp13
worker.department3.port=5000
worker.department3.host=192.168.7.10

Add Entry in httpd.conf
Apache httpd server is installed. mod_jk module is installed and workers.properties file is created. but these 3 are isolated. we put together,
we need to configure the httpd server.

find the conf/httpd.conf file in Apache installed location and add these following entries to it

LoadModule jk_module modules/mod_jk.so

JkWorkersFile conf/workers.properties

JkLogFile logs/mod_jk.log
JkLogLevel emerg
JkLogStampFormat “[%a %b %d %H:%M:%S %Y] ”
JkOptions +ForwardKeySize +ForwardURICompat -ForwardDirectories
JkRequestLogFormat “%w %V %T”

here
LoadModule – Load mod_jk shared module to Apache httpd server (enable the mod_jk module)
JkWorkersFile – Specify the workers.properties file location
all others are logging system of mod_jk. Its boilerplate code just copy and paste.

Delegate httpd to Tomcat
now we inform to Apache httpd server how delegate the request to corresponding server.

JkMount /department1* department1
JkMount /department2* department2
JkMount /department3* department3

here
JkMount – specify the if URL have /department1* pattern then that request delegate to department1 worker. that worker IP address and port is specified in workers.properties file.

Iwe changed /etc/hosts file like last post all web site domain pointed to apache httpd web server.

if we access http://www.ramki.com/department1/index.html how Apache httpd server process the request
Its perfectly called correct tomcat server and we got right response.

but we have 2 problem
1. i don’t want the my URL like this http://www.ramki.com/department1/index.html
i want the my URL like this http://www.ramki.com/index.html

remove the department1 from my URL. but department1 string is very important in URL because JkMount is works based on this matching string only.

2. http://www.ramki.com/department1/index.html is for first tomcat and second department have domain http://www.krishnan.com then
access second tomcat we use URL : http://www.krishnan.com/department2/index.html
but same time when we use URL http://www.krishnan.com/department1/index.html then we access first tomcat data
(i.e )
http://www.ramki.com/department1/index.html == http://www.krishnan.com/department1/index.html
because both these URL have department1 key word.. so JkMount is works based on these keyword. As the Result wrong interpretation. How to solve this Issue?.

Virtual Host in Apache httpd Server
we need add conditional JkMount. for example ramki.com domain asks the whereare paths like department1,department2 we need to search in that tomcat only. not other place. to add this conditioned we add virtual host entries.

Add virtual host entry in httpd.conf file

Listen 80
NameVirtualHost *:80

ServerName http://www.ramki.com
JkMount /department1* department1

ServerName http://www.krishnan.com
JkMount /department2* department1

here
ServerName – domain name of the server

If http://www.krishnan.com/department1/index.html URL is like this now. server matches the Server Name. here its matches 2nd virtual host entry. There are single JkMount entry is there in 2nd Virtual-Host. and there no matching department1 string.
JkMount /department2* department1
as the result 404 error page is responded. Its works good.

Now everythig works fine.
now my URL is http://www.ramki.com/department1/index.html here i don’t want department1 path in my URL.
i want simply http://www.ramki.com/index.html then we use mod_rewrite engine

Listen 80
NameVirtualHost *:80

ServerName http://www.ramki.com
RewriteEngine on
RewriteLog logs/apache-mod_rewrite
RewriteRule ^/(.*)$ /department1/$1 [L,PT]
JkMount /*

here
RewriteEngine on – Turn on the Rewrite module
RewriteRule ^/(.*)$ /department1/$1 [L,PT] – here ^/(.*)$ its matches any string it capture the value to $1 and change the URL to /department1/$1
i.e
http://www.ramki.com/index.html here ^/(.*)$ its matches index.html it capture to $1 and replaced to /department1/$1 ==> /department1/index.html

Rewrite is happen before delegate the request to Tomcat. so we change the URL transparently to browser.

now client (browser) just send http://www.ramki.com is enough to access the Department 1 Tomcat.

Update : I posted Virtual Host + Nginx + Tomcat Its easy to configure, compare to Apache httpd server

I hope everything is clear. If any misunderstanding please let me know.

Screen Cast :
 
1 Comment

Posted by on September 17, 2013 in Apache Server


How to install Apache, Java, Tomcat and Solr

How to install Apache, Java, Tomcat and Solr

Here is the procedure to install Apache, Tomcat, Java and Solr:

First of all we need Apache in our box:
Download the Apache source.

tar -zxvf httpd-2.2.24.tar.gz
cd httpd-2.2.24
./configure --enable-so --enable-expires --enable-file-cache --enable-cache --enable-disk-cache --enable-mem-cache --enable-headers --enable-ssl --enable-http --disable-userdir --enable-rewrite --enable-deflate --enable-proxy --enable-proxy-connect --enable-proxy-ftp --enable-proxy-http --enable-proxy-ajp --enable-proxy-balancer --enable-cgi --disable-dbd --enable-modules=most --with-mpm=worker --prefix=/usr/local/apache2
make; make install
/usr/local/apache2/bin/apachectl -t

./configure : Specify the modules which you want to install for your Apache ( ./configure with out specified modules will install all the modules )
–prefix= :  Its used to specify the path where you need to install Apache.
apachectl -t : To check the syntax of Apache

Download Java from oracle site as Tomcat and Solr will be needing Java to work, after that follow these steps:

chmod 777 jdk-6u17-linux-i586.bin
./jdk-6u17-linux-i586.bin
mkdir -p /usr/java
cp -r  jdk1.6.0_17 /usr/java/
ln -s /usr/java/jdk1.6.0_17/bin/java /usr/bin/java
java -version

Change the .bin permission to executable by +x or 755 or 777.
ln -s :  Created the soft link for java to be executed from any where, you can also create environment variable for java according to you need.
java -version will display the java version installed.

Now once your java is installed correctly and enviornment is set download the Tomcat:

tar -zxvf apache-tomcat-7.0.39.tar.gz
mkdir  -p  /usr/tomcat
cp -rf apache-tomcat-7.0.39/* /usr/tomcat/
ls /usr/tomcat/
/usr/tomcat/bin/version.sh

Now we need Tomcat Native to link Apache and Tomcat with each other so download the tomcat-connectors:

tar -zxvf tomcat-connectors-1.2.37-src.tar.gz
cd tomcat-connectors-1.2.37-src/native/
./configure --with-apxs=/usr/local/apache2/bin/apxs  --with-java-home=/usr/java/jdk1.6.0_17 --prefix=/usr
make
make install

Now add the configuration which you want to setup for your Tomcat server in httpd.conf and worker.properties:

cd /usr/local/apache2/conf/
cp httpd.conf httpd.conf.original
vi worker.properties
vi httpd.conf
../bin/apachectl stop
../bin/apachectl start

Here is demo configuration for httpd.conf and workers.properties:

configure httpd.conf. 

JkWorkersFile /usr/local/apache2/conf/worker.properties
JkLogFile logs/jk-log
# Set the jk log level debug/error/info
JkLogLevel info
# Select the log format
JkLogStampFormat "%a %b %d %H:%M:%S %Y "
# JkOptions indicate to send SSL KEY SIZE,
JkOptions +ForwardKeySize +ForwardURICompat -ForwardDirectories
# JkRequestLogFormat set the request format
JkRequestLogFormat "%w %V %T"
# Mount your applications
JkMount /rest/* node1 


configure workers.properties. 

# Define 1 real worker using ajp13
worker.list=worker1
# Set properties for worker1 (ajp13)
worker.worker1.type=ajp13
worker.worker1.host=localhost
worker.worker1.port=8009
# modifications after using mpm worker
worker.worker1.connection_pool_size=128
worker.worker1.connection_pool_timeout=600
worker.worker1.socket_keepalive=1  
 
Leave a comment

Posted by on September 17, 2013 in Apache Server